Row-Level Security (RLS) is one of those database concepts that sounds intimidating—until someone explains it the right way.
Think of it like a lunchbox rule at school.
Everyone can open the fridge, but you can only take your lunchbox—not your friend’s, not your teacher’s.
A database works the same way. Many users can access the same table, but RLS puts a “name tag” on every row, ensuring each user only sees the rows they’re allowed to see.
The best part? The database enforces this automatically. Your application doesn’t have to remember to add filters every time. Even if the application forgets, the database simply says, “Nope, that’s not your data.”
Your data stays yours. Everyone else’s stays theirs.
Databricks provides Row-Level Security in its own way through Unity Catalog. Let’s see what’s required to implement Row-Level Security in Databricks.
Prerequisite
- Databricks instance with UC enabled
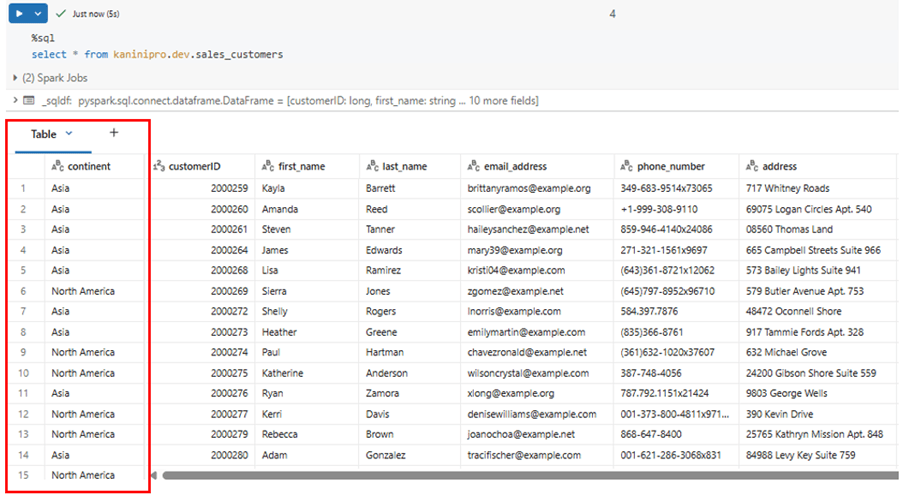
- Sample data for testing
Sample Data
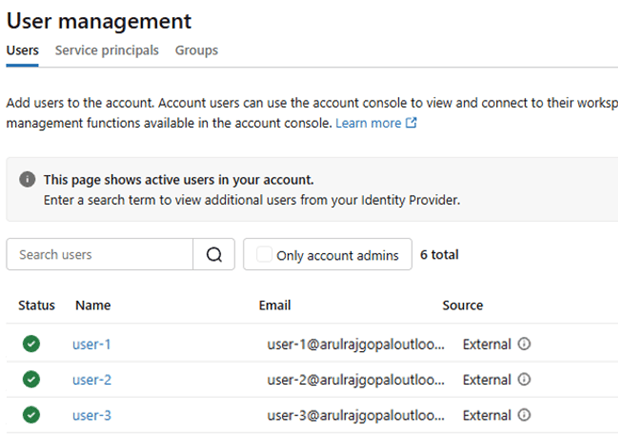
Databricks Users created and assigned to groups as per below.
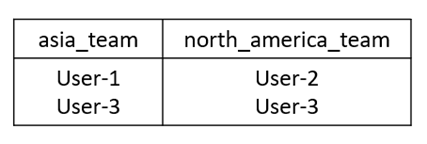
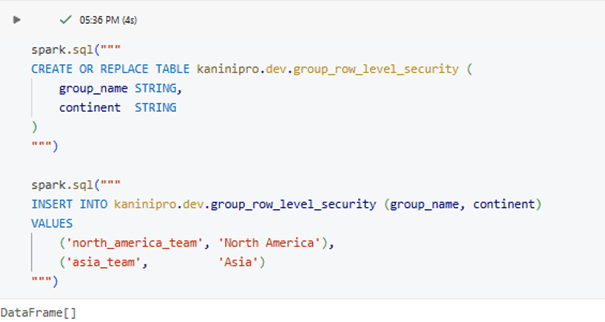
Created metadata to map which group should have access for which data.
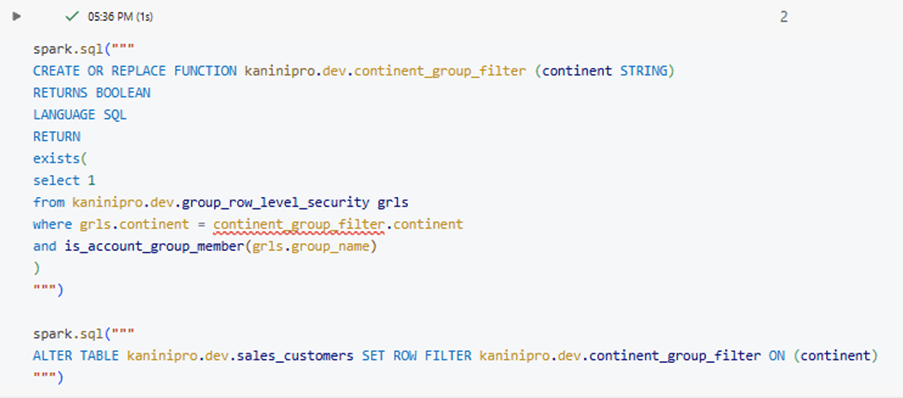
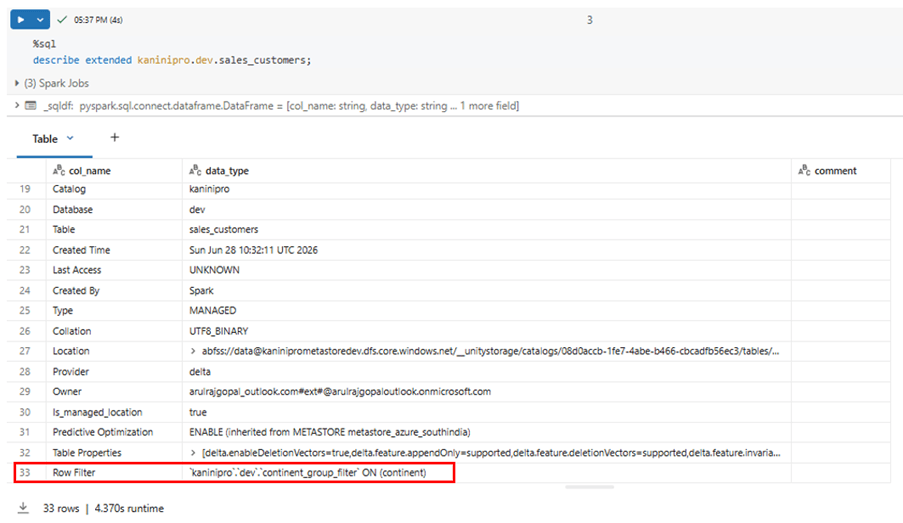
Create Unity Catalog SQL UDF which filters and mapped to the table.
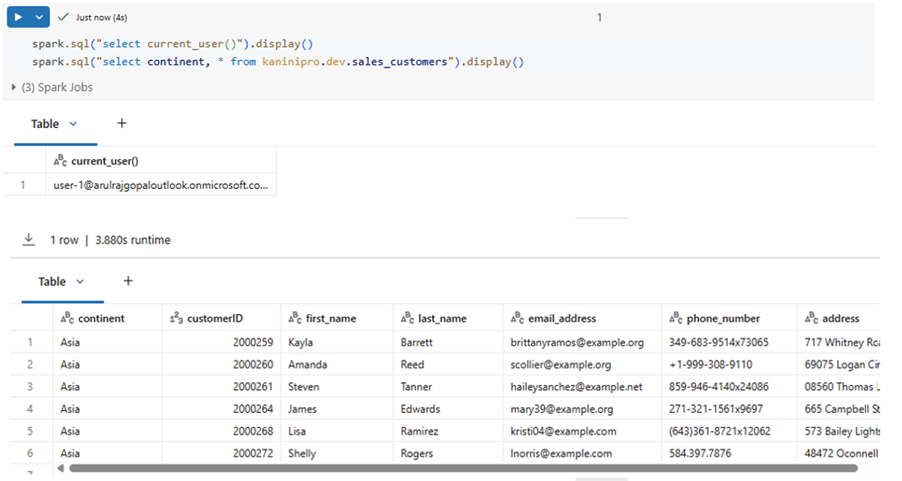
Now query the data from user-1 which is only part of asia_team,
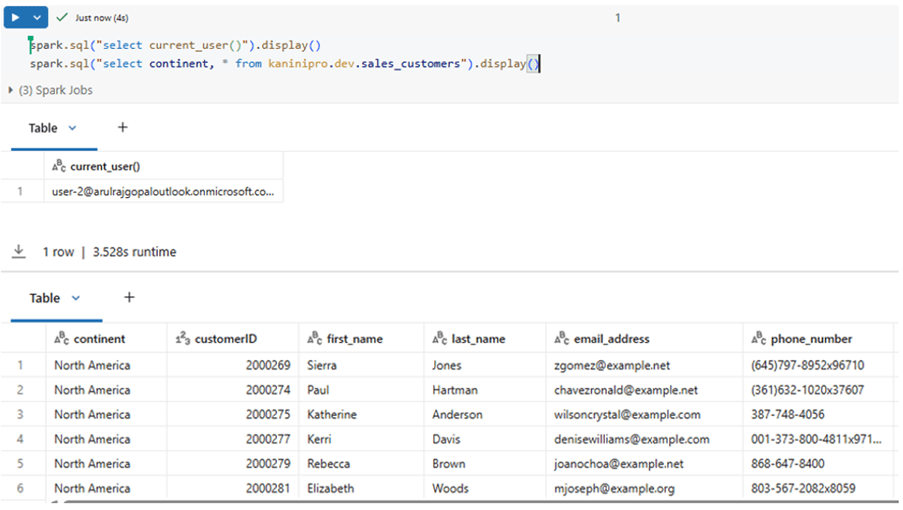
Query the data from User-2, which is only part of north_america_team,
Query the data from User-3, which can access both the data.
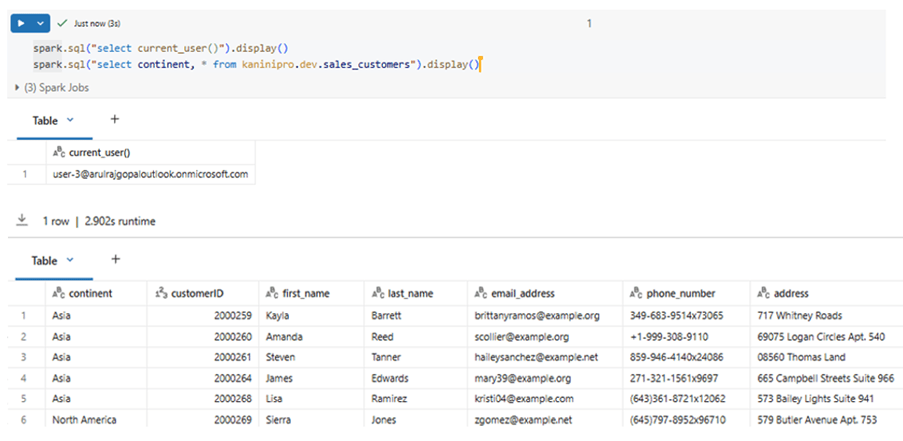
This demo explains how to implement Row-Level Security (RLS) in Databricks. While RLS can be configured at the individual user level, managing permissions for every new user requires ongoing metadata updates. In production environments, implementing RLS using groups is the recommended approach, as it is more scalable, easier to maintain, and simplifies access management.
I’ve attached the code used in this demo in the link below, so you can follow along and try it yourself.
References
https://docs.databricks.com/aws/en/data-governance/unity-catalog/filters-and-masks

Leave a Reply